
 Angular PWA


In this post, we are going to go through a complete example of how to implement Web Push Notifications in an Angular Application using the Angular Service Worker.
Note that these are the exact same native notifications that we receive for example on our mobile phones home screen or desktop, but they are triggered via a web application instead of a native app.
These notifications can even be displayed to the user if all application tabs are closed, thanks to Service Workers! When well used, Push notifications are a great way of having our users re-engage with our application.
This is a step-by-step tutorial, so I invite you to code along as we implement Push Notifications in an existing application.
We will also learn along the way how Push Notifications work in general, as we follow and explain the complete flow that a given notification follows.
The Angular PWA series
Note that this post is part of the Angular PWA Series, here is the complete series:
- Service Workers - Practical Guided Introduction (several examples)
- Angular App Shell - Boosting Application Startup Performance
- Angular Service Worker - Step-By-Step Guide for turning your Application into a PWA
- Angular Push Notifications - Step-by-Step Guide
Table of Contents
In this post, we will cover the following topics:
- How do Push Notifications work?
- Browser Push Service Providers
- What is a VAPID key pair?
- generating a VAPID key pair using node webpush
- Subscribing to Push Notifications
- showing again the Allow/Deny Notifications popup
- Understanding the PushSubscription object and its properties
- How to use the Push Subscription?
- Sending Push Notifications from a Node backend
- Push Notifications In Action - Demo
- Source Code + Github Running Example (complete Angular PWA)
So without further ado, let's get started learning how to handle Push Notifications with the Angular Service Worker.
Introduction to Push Notifications
What we know as Web Push Notifications are actually based on two separate browser standards:
-
Push API - this is an API that allows messages to be pushed from a server to a browser (even when the site isn't focused or the browser is closed)
-
Notifications API: displays native system notifications to the user
The Push API is what allows the message to be pushed from a server to the browser, and the Notifications API is what allows the message to be displayed, once it gets to the browser.
But notice that we can't push notifications from our server directly to the user's browser. Instead, only certain servers that browser development companies (like Google, Mozilla, etc.) specifically choose will be able to push notifications to a given browser.
These servers are known as a Browser Push Service. Note that for example, the Push Service used by Chrome is different than the one used by Firefox, and each Push Service is under control of the corresponding browser company.
Browser Push Service Providers
As we sometimes see online, Push Notifications can be very disruptive to the user, and browser implementers want to ensure that browser users have a good online experience at all times.
This means that browser providers want to be able to block out certain notifications from being displayed to the user, for example if the notifications are too frequent.
The way that browsers like Chrome or Firefox ensure that Push messages don't cause user experience issues is to funnel all push messages over servers under their control.
For example, in the case of the Chrome browser, all Push messages come to the browser via the Firebase Cloud Messaging service and NOT directly from our application server.
Firebase Cloud Messaging acts in this case as the Chrome Browser Push Service. The Push Service that each browser uses cannot be changed, and is determined by the browser provider.
In order to be able to deliver a message to a given user and only to that user, the Push Service identifies the user in an anonymous way, ensuring the user privacy. Also, the Push Service does not know the content of the messages, as they are encrypted.
Let's then go through the whole lifecycle of a particular message, to understand in detail how everything works. We will start by uniquely identifying our server, and learn why that's important.
Why identify our server as a Push source?
The first thing that we should do is to uniquely identify our server to the several Browser Push Services available.
Each Push Service will analyze the behavioral patterns of the messages being sent in order to avoid disruptive experiences, so identifying our server and using the push messages correctly over time will increase our odds that the Push Service will deliver our messages in a timely manner.
We will then start by uniquely identifying our Application server using a VAPID key pair.
What is a VAPID key pair?
VAPID stands for Voluntary Application Server Identification for Web Push protocol. A VAPID key pair is a cryptographic public/private key pair that is used in the following way:
- the public key is used as a unique server identifier for subscribing the user to notifications sent by that server
- the private key needs to be kept secret (unlike the public key) and its used by the application server to sign messages, before sending them to the Push Service for delivery
Generating a VAPID key pair using node web-push
Let's start by generating a VAPID key using the node webpush library. We will first install the webpush library globally, as a command line tool:
npm install web-push -g
We can then generate a VAPID key pair with the following command:
web-push generate-vapid-keys --json
Using this command, here is what a VAPID key pair looks like:
We can now use the VAPID Public Key to subscribe to Push Notifications using the Angular Service Worker.
Subscribing to Push Notifications
The first thing that we will need is the Angular Service Worker, and for that here is a guide for how to add it to an existing Angular application.
Once we have the Angular Service Worker installed, we can now request the user permission for sending Push Notifications:
Let's break down what is going on in this code sample:
-
the user clicks on the Subscribe button and the
subscribeToNotifications()method gets executed -
using the
swPushservice, we are going to ask the user if he allows our server (identified by the VAPID public key) to send him Web Push messages -
the
requestSubscription()method returns a Promise which emits the push subscription object, in case the user allows notifications -
The user is then going to see a browser popup asking him to allow or deny the request:

- if the user accepts the request, the Promise returned by
requestSubscription()is going to be evaluated successfully, and a push subscription object is going to be passed to.then()
Showing again the Allow/Deny Notifications Popup
While testing this on localhost, you might accidentally hit the wrong button in the popup. The next time that you click subscribe, the popup will not be displayed.
Instead, the Promise is going to be rejected and the catch block in our code sample above is going to be triggered.
Here is what we need to do in order to have the popup displayed again:
- go to chrome://settings/content/notifications
- scroll down the Block list, containing all the websites that are blocked from emitting push notifications
- delete localhost from the Block list
- Click the Subscribe button again
The popup should now appear again, and if we click on the Allow option, a Push Subscription object will be generated.
The PushSubscription object
Here is what the push subscription object looks like, as we receive it in the then() clause:
Let's now break down the content of the subscription object, as that will help us to understand better how Push Notifications work in general:
endpoint: This contains a unique URL to a Firebase Cloud Messaging endpoint. This url is a public but unguessable endpoint to the Browser Push Service used by the application server to send push notifications to this subscriptionexpirationTime: some messages are time sensitive and don't need to be sent if a certain time interval has passed. This is useful in certain cases, for example, if a message might contain an authentication code that expires after 1 minutep256dh: this is an encryption key that our server will use to encrypt the message, before sending it to the Push Serviceauth: this is an authentication secret, which is one of the inputs of the message content encryption process
All the information present in the subscription object is necessary to be able to send push notifications to this user.
How to use the Push Subscription object?
Once we get a push subscription, we need to store it somewhere where we can use it later, once we decide to send a message to this user.
In our example, we are sending the whole subscription object to the backend via an HTTP request done by the NewsletterService, and the complete subscription object will be stored in the database for later use.
Sending Push Notifications from a Node Backend
Now that we have the multiple subscription objects stored in the database, we can now use them to send push messages using the webpush library.
Let's then create a REST endpoint using Express, that when triggered will result in a notification to be sent to all subscribers.
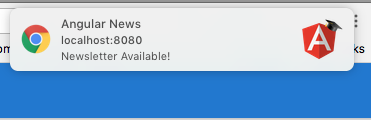
In this example, we are sending a Notification informing that a newsletter is now available:
Let's now break down this example. We are using again the webpush module, but this time to encrypt, sign and send a push notification to all subscribers:
-
we start by initializing the
webpushmodule, by passing it the VAPID key pair -
in this simple example the keys are in the code, which is NOT recommended. Instead, we can pass a reference to a JSON file containing the key pair via a command line argument
-
we are then initializing an Express application, and we have created an HTTP POST endpoint for the
/api/newsletterurl
In order to trigger this endpoint, our application can send an HTTP post call to /api/newsletter.
Notice that this endpoint would have to be protected by both authentication and authorization middleware, in order to ensure that only an administrator can trigger the sending of a newsletter.
Building the Push Message body
In order for the Angular Service Worker to correctly display the message, we need to use the format shown in the code.
Namely, we will the payload to be one root object containing one property named notification, otherwise the messages will not be displayed to the user.
Besides the text and image of the notification, we can also specify a mobile vibration pattern via the vibrate property.
Sending the Push Notification using webpush
Once we have the message payload ready, we can send it to a given subscriber via a call to webpush.sendNotification():
-
the first argument is the push subscription object, just like we received it in the browser after the user has clicked the Allow Notifications option
-
the second argument is the notification payload itself, in JSON format
The webpush library will then do the following steps:
-
the payload of the message is going to be encrypted using the
p256dhpublic key and theauthauthentication secret -
the encrypted payload is then going to be signed using the VAPID private key
-
the message is then going to be sent to the Firebase Cloud Messaging enpoint specified in the
endpointproperty of the subscription object
What happens at the level of the Push Service?
When the Push service receives the message (in this case Firebase Cloud Messaging), it will know to which browser instance to forward the message to based on the unique url of the endpoint.
Note that the Push Service does not know the content of the message because its encrypted, so it cannot inspect it to decide if the message should go through or not.
But the Push Service might decide to block the message, if for example this subscriber has already been receiving too many messages.
In most cases, what will happen is that the Push Service is going to forward the message payload to the user's browser.
Push Notification Demo
Once the Push Service pushes the message to the user browser, the message is then going to be decrypted and passed to the Angular Service Worker.
The Angular Service Worker will then use the browser Notifications API to display a Notification to the user.
The end result is a system notification similar to the one that we often receive from mobile apps:
Source Code + Github Running Example (complete PWA)
A running example of the complete code is available here on this branch on Github. The PWA features demonstrated are:
- Application Download & Installation
- Application Version Management
- One-Click Install with App Manifest
- Application Data Caching
- Application Shell
- Push Notifications
- sample Express Server using
webpush
I hope that this post helps with getting started with sending Push Notifications and that you enjoyed it!
If you would like to learn a lot more Angular Progressive Web Applications, we recommend checking the Angular PWA Course, where we cover PWAs in much more detail.
If you have some questions or comments please let me know in the comments below and I will get back to you.
To get notified of upcoming posts on Progressive Web Applications and other Angular topics, I invite you to subscribe to our newsletter:
If you are just getting started learning Angular, have a look at the Angular for Beginners Course:
